Unlike Google Docs, we don’t have any option to add Headers and Footers to the Sheet normally. To add headers and footers, we’ll have to print the sheet first.
In this tutorial we have outlined the detailed steps do add basic headers/footers and custom headers/footers. Stay Tuned.
Table of Contents
What is Header and Footer?
Before we understand the underlying steps let’s align on the definitions.
Header is the information that is present on the top of the page. Can be page title, section name, document name etc
Footer is the information that is present in the bottom of the page. Can be page numbers, dates etc.
Below is a sample page indicating what header and footer looks like on a Google Spreadsheet.

Steps to Add Header and Footer in Google Sheet
Follow the below steps:
Step 1: Open the Google Sheet Document you wanted to add headers and footers too.

Step 2: Under Menu bar goto File -> Print.(or use the shortcut Ctrl+P)

A new window like the below will open.

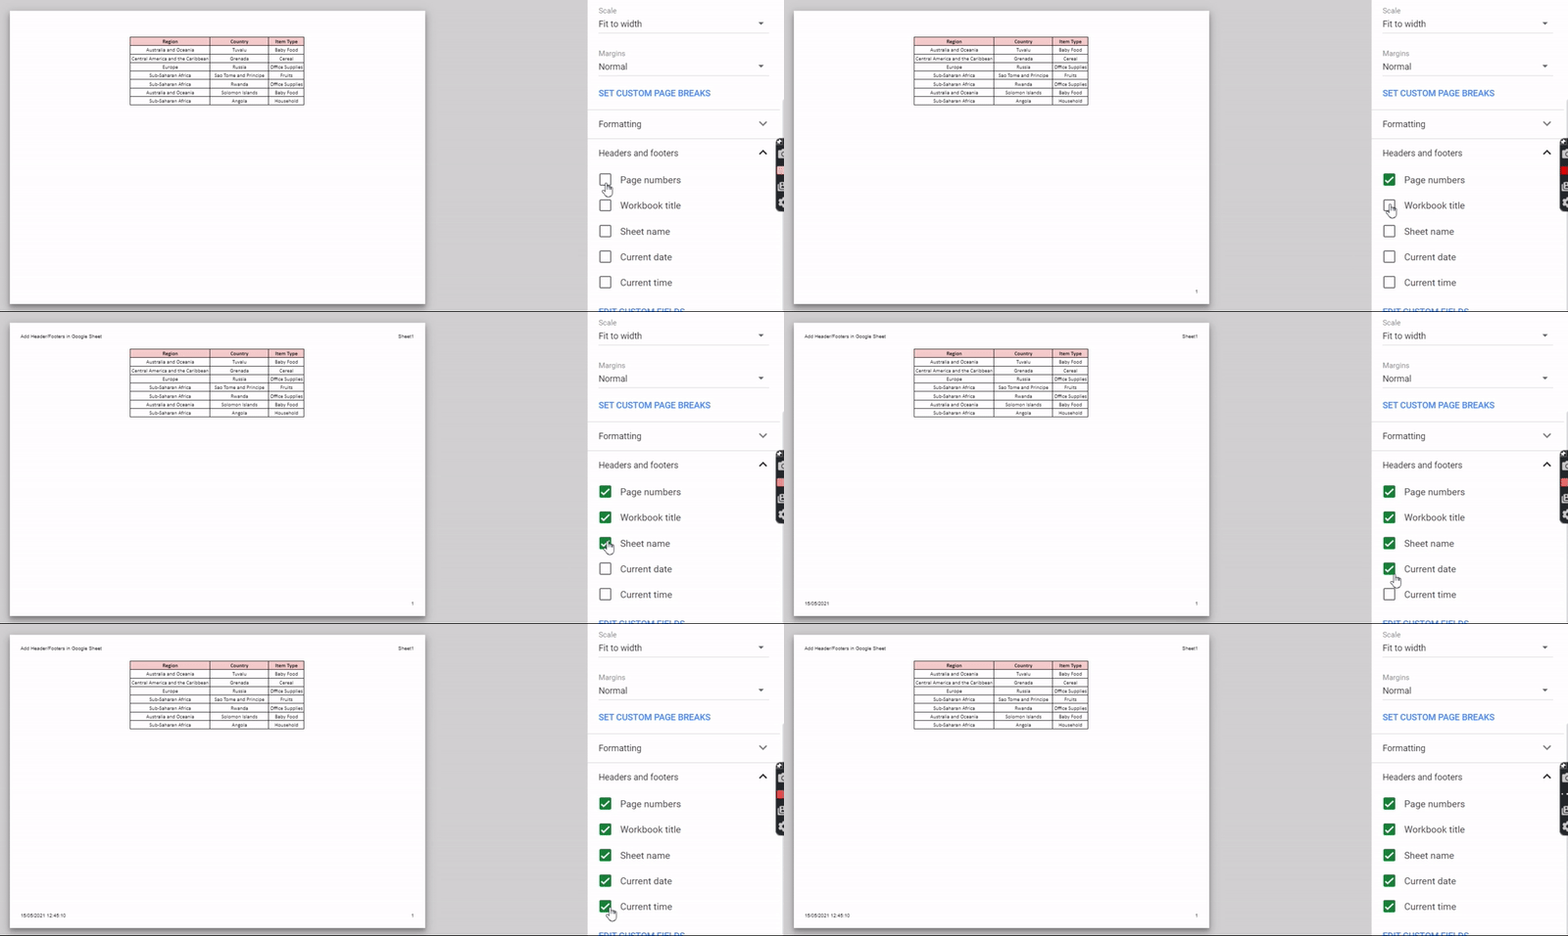
Step 3: Click Headers and Footers on the Right hand side Panel. Now choose the elements you want to have in header and footers. Don’t worry about the placement. Google Sheets will Take Care of it.

Step 4: Say, we selected all the options. Below is what our page will look like.

As you can see all the elements, like Page Numbers, Date Time, Sheet Name, Document Name have been placed at different positions in Header/Footer.
Below is a demo of how this looks in action:

Adding Custom Headers and Footers in Google Sheets
In case you want to add custom headers then click “EDIT CUSTOM FEILDS” in Step 3 of previous section.

Next, Add the Custom Header and Footer Text.

Then Click Confirm on top-right hand corner.

That’s it on this topic. If you still have any questions, then drop a comment below. Keep browsing SheetsInfo for more such useful information 🙂


