Text Rotation in Google Sheet is a lesser used feature, but comes in quite handy for formatting reasons at times. Best of all it’s very easy to implement.
In the tutorial we’ll focus on discussing all the known methods to perform text rotation.
Table of Contents
Text Rotation using the Toolbar Option
Follow the below steps to Rotate the Text using Toolbar controls.
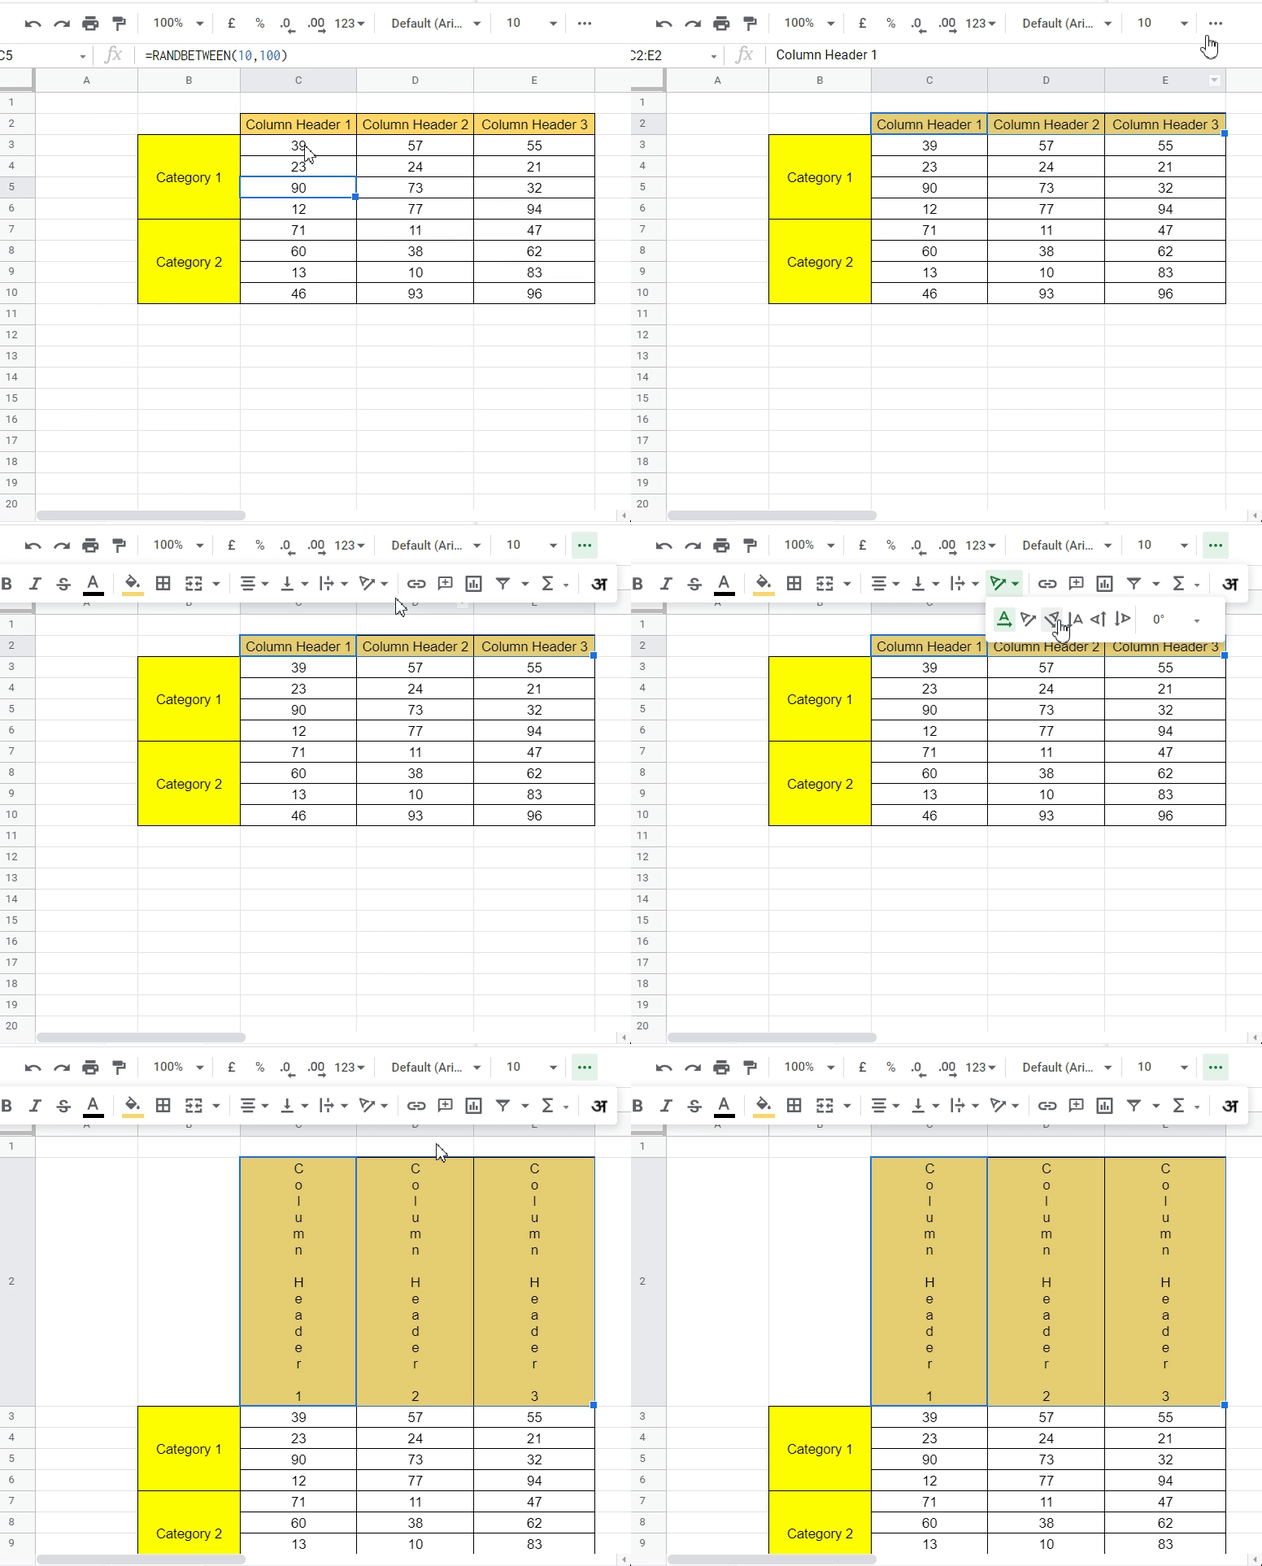
1: Select the Cells you would like to rotate. In out case we want to rotate “Category 1” and “Category 2”.

2: Now move over to the toolbar option and click on the below icon. It’s present towards the right.

3: Post Clicking you’ll be able to see multiple rotation options. It even gives you a glimpse of the rotation which will take effect. We’ll choose rotate up.

4: Once done, the results are there for us to see.

This is just of the ways to make text vertical. You can also try out other options and each will give you a different result.
For example is we choose the option of Stack Vertically then we end up getting the below output.

Clearly this option is meant to be used only when text length is small. One more observation is that the row height is auto adjusted to adjust for the vertical text length.
Text Rotation Using the Menu Option
If you love to do things via the Menu then this is the option you should go with.
Goto Menubar -> Format->Text Rotation. Now select any of the rotation option as per requirement.

That’s it on this topic. Keep browsing SheetsInfo for more such useful information 🙂


